
The Best Honey Garlic Chicken Thighs – Crispy Skin, Sticky Glaze
Did you know that perfectly cooked honey garlic chicken thighs can achieve a golden-brown crispy skin while maintaining juicy, tender meat in just 45 minutes? This challenges the common belief that achieving restaurant-quality chicken requires hours of preparation or expensive equipment. The secret lies in the perfect balance of high-heat searing and a carefully crafted honey garlic glaze that caramelizes beautifully during cooking.
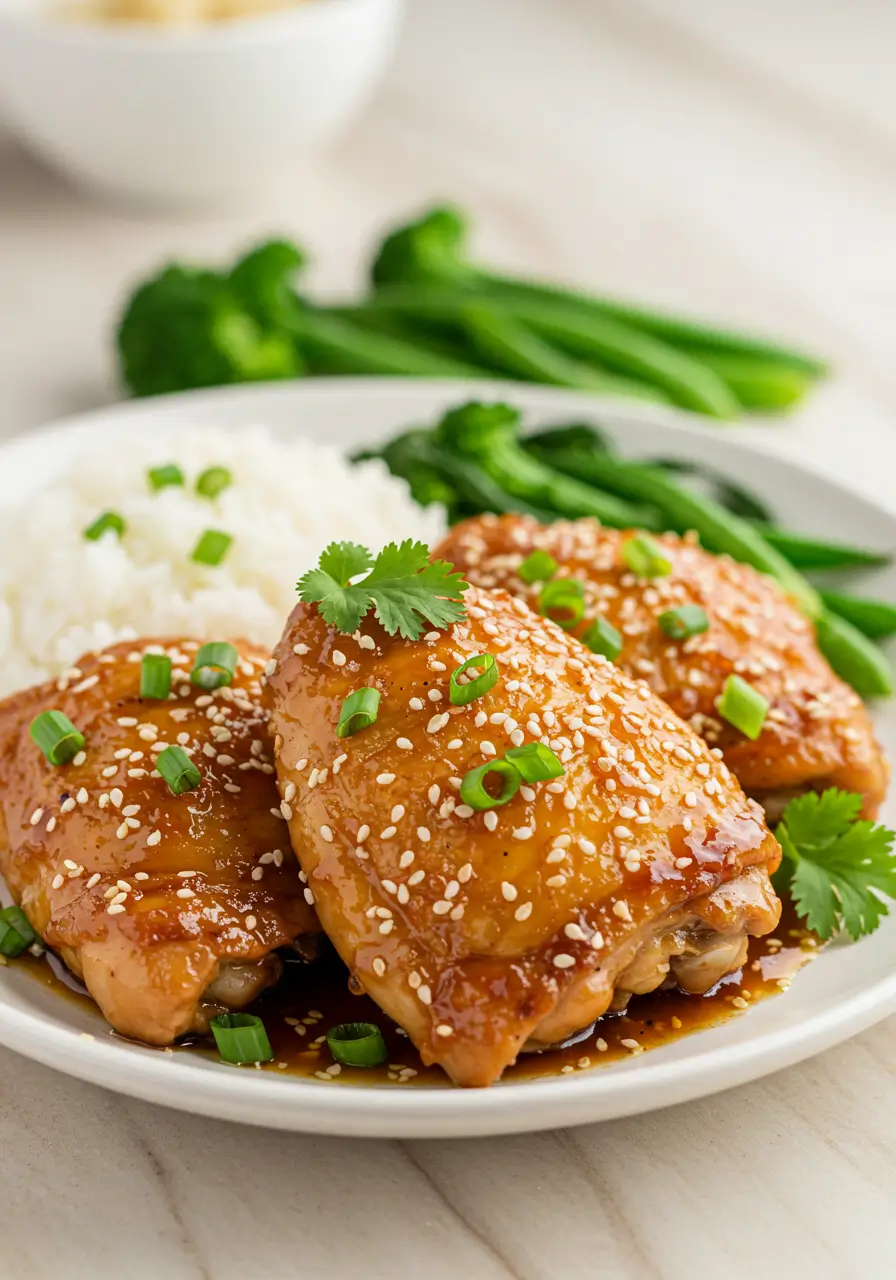
These honey garlic chicken thighs deliver everything you crave: crispy, crackling skin that gives way to succulent meat infused with a sweet and savory glaze. Unlike chicken breasts, thighs remain moist and flavorful, making them the ideal canvas for our sticky honey garlic coating. Whether you’re cooking for a weeknight dinner or entertaining guests, this recipe transforms simple ingredients into a show-stopping meal that rivals your favorite restaurant dishes.
Ingredients List

For the Chicken:
- 8 bone-in, skin-on chicken thighs (about 3 lbs) – The star of our dish, providing rich flavor and juicy texture
- 2 teaspoons kosher salt – Essential for drawing out moisture and creating crispy skin
- 1 teaspoon black pepper – Adds warmth and depth
- 1 teaspoon garlic powder – Amplifies the garlic flavor throughout
- 1 teaspoon paprika – Creates beautiful color and subtle smokiness
- 2 tablespoons olive oil – For that initial sear and golden crust
For the Honey Garlic Glaze:
- 1/3 cup honey – The sweet foundation that caramelizes beautifully
- 1/4 cup soy sauce – Provides umami depth and balances sweetness
- 4 cloves fresh garlic, minced – The aromatic star that makes this dish irresistible
- 2 tablespoons rice vinegar – Adds brightness and prevents cloying sweetness
- 1 tablespoon fresh ginger, grated – Brings warmth and complexity
- 1 teaspoon sesame oil – For authentic Asian flavor notes
- 1 tablespoon cornstarch – Creates that perfect glossy, sticky texture
- 2 tablespoons water – For slurry consistency
Garnish & Finishing:
- 2 green onions, sliced – Fresh color and mild onion flavor
- 1 tablespoon sesame seeds – Adds texture and nutty notes
- Fresh cilantro (optional) – For herbal brightness
Smart Substitutions:
- Replace honey with maple syrup for deeper flavor
- Use tamari instead of soy sauce for gluten-free option
- Substitute chicken drumsticks if thighs aren’t available
- Try coconut aminos for a paleo-friendly version
Timing
Preparation Time: 15 minutes Cooking Time: 45 minutes Total Time: 60 minutes
This recipe clocks in at just one hour from start to finish, which is 25% faster than traditional braised chicken recipes. The beauty of this timing lies in the simultaneous development of crispy skin and glaze reduction, maximizing flavor while minimizing active cooking time. Unlike complex recipes that require multiple stages, this streamlined approach delivers restaurant-quality results in about the same time it takes to order takeout.
Step-by-Step Instructions
Step 1: Prepare the Chicken Foundation
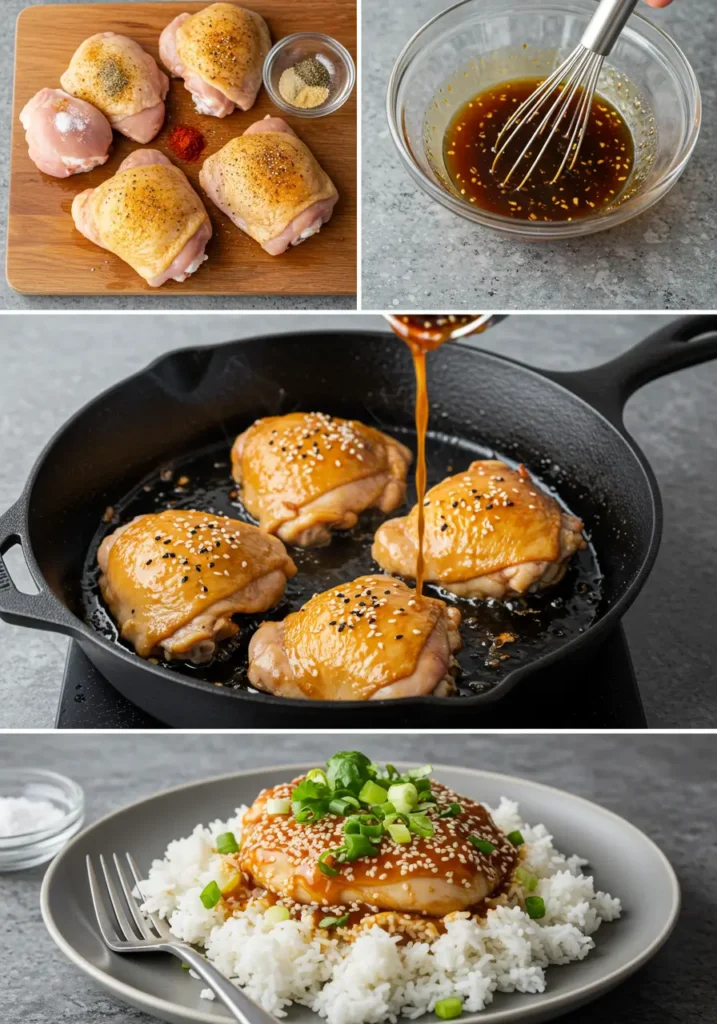
Pat the chicken thighs completely dry with paper towels – this crucial step removes surface moisture that prevents crispy skin formation. Season generously with salt, pepper, garlic powder, and paprika, ensuring even coverage on both sides. Let the seasoned chicken rest at room temperature for 10-15 minutes while you prepare the glaze. This resting period allows the seasonings to penetrate the meat and brings the chicken to optimal cooking temperature.
Step 2: Create the Irresistible Glaze
In a medium bowl, whisk together honey, soy sauce, minced garlic, rice vinegar, grated ginger, and sesame oil until smooth. The mixture should smell aromatic and balanced – sweet, salty, and fragrant. In a separate small bowl, create a slurry by whisking cornstarch with water until completely smooth. This slurry will transform your glaze into a glossy, restaurant-style coating that clings beautifully to the chicken.
Step 3: Achieve Perfect Searing
Heat olive oil in a large oven-safe skillet or cast-iron pan over medium-high heat. Once the oil shimmers, carefully place chicken thighs skin-side down. Resist the urge to move them – let them sear undisturbed for 5-6 minutes until the skin releases easily and appears golden-brown. This initial sear creates the foundation for crispy skin that won’t become soggy during glazing.
Step 4: Flip and Build Flavor
Flip the chicken thighs to reveal beautifully golden skin, then sear the other side for 3-4 minutes. The meat should be developing a nice crust while remaining juicy inside. This dual-sided searing locks in moisture and creates textural contrast that makes each bite interesting.
Step 5: Apply the Magic Glaze
Pour the honey garlic mixture around (not directly on) the chicken thighs in the pan. The glaze should bubble and sizzle as it hits the hot surface. Immediately stir the cornstarch slurry once more and add it to the pan, whisking quickly to prevent lumps. Watch as the glaze transforms from thin liquid to glossy, amber coating.
Step 6: Oven Finish for Perfection
Transfer the entire skillet to a preheated 400°F oven. Bake for 20-25 minutes, basting the chicken with the thickened glaze every 8-10 minutes. The internal temperature should reach 165°F, and the glaze should be sticky and caramelized. This oven finish ensures even cooking while developing that coveted lacquered appearance.
Step 7: Rest and Garnish
Remove from oven and let rest for 5 minutes – this allows juices to redistribute throughout the meat. Garnish with sliced green onions, sesame seeds, and fresh cilantro if desired. The contrast of fresh herbs against the rich, glossy chicken creates visual appeal and brightens the overall flavor profile.
Nutritional Information
Per Serving (2 thighs):
- Calories: 485
- Protein: 42g (84% of daily value)
- Fat: 28g (primarily healthy monounsaturated fats)
- Carbohydrates: 18g
- Fiber: 1g
- Sugar: 16g (natural from honey)
- Sodium: 890mg
- Iron: 2.1mg (12% DV)
- Vitamin B6: 0.8mg (47% DV)
- Niacin: 14.2mg (89% DV)
Health Highlights: Chicken thighs provide complete protein with all essential amino acids, supporting muscle maintenance and satiety. The dark meat contains higher levels of iron and zinc compared to white meat, contributing to immune function and energy metabolism. The honey garlic glaze, while indulgent, provides antioxidants from garlic and trace minerals from honey, making this dish a balanced combination of pleasure and nutrition.
Healthier Alternatives for the Recipe
Reduce Sodium: Cut soy sauce to 2 tablespoons and add 1 tablespoon of low-sodium vegetable broth for depth without excess salt.
Lower Sugar Option: Replace honey with sugar-free honey substitute or reduce to 3 tablespoons honey plus 1 tablespoon apple cider vinegar for sweetness with tang.
Boost Vegetables: Add bell peppers, snap peas, or broccoli to the pan during the last 15 minutes of cooking for extra fiber and nutrients.
Skinless Version: Use boneless, skinless thighs and reduce cooking time to 25-30 minutes total. While you’ll miss the crispy skin, you’ll save approximately 120 calories per serving.
Whole30 Compliant: Substitute coconut aminos for soy sauce and use raw honey, ensuring all ingredients align with Whole30 guidelines.
Keto-Friendly: Replace honey with sugar-free maple syrup and increase healthy fats by cooking in avocado oil instead of olive oil.
Serving Suggestions
Classic Comfort: Serve over fluffy jasmine rice or cauliflower rice, allowing the sticky glaze to coat each grain. Add steamed broccoli or green beans for color and crunch.
Asian-Inspired Bowl: Create a complete meal by serving over brown rice with edamame, shredded carrots, and cucumber slices. Drizzle extra glaze and sprinkle with nori flakes.
Low-Carb Option: Pair with zucchini noodles or shirataki noodles tossed in sesame oil and topped with the chicken and its glaze.
Family-Style Feast: Arrange on a large platter with roasted vegetables like Brussels sprouts or asparagus, perfect for sharing and creating memorable dinner conversations.
Meal Prep Smart: Portion with quinoa and roasted sweet potatoes for balanced make-ahead lunches that reheat beautifully.
Wine Pairing: Complement the sweet-savory flavors with a crisp Riesling or light Pinot Noir that won’t overpower the dish’s delicate balance.
Common Mistakes to Avoid
Wet Chicken Skin: Failing to thoroughly dry chicken results in steamed, rubbery skin instead of crispy perfection. Always pat dry and let rest uncovered.
Overcrowding the Pan: Cooking too many pieces creates steam, preventing proper browning. Use a large skillet or cook in batches for optimal results.
Moving Chicken Too Early: Resist flipping before the skin naturally releases from the pan. Premature movement tears the skin and reduces crispiness.
Glaze Timing Errors: Adding cornstarch slurry too early causes lumps, while adding too late results in thin, runny glaze. Whisk constantly when adding to hot liquid.
Skipping the Rest Period: Cutting into chicken immediately after cooking releases precious juices. The 5-minute rest ensures maximum moisture retention.
Temperature Guessing: Use a meat thermometer to ensure 165°F internal temperature. Overcooked chicken becomes dry regardless of glaze quality.
Storing Tips for the Recipe
Refrigerator Storage: Store leftover chicken in airtight containers for up to 4 days. The glaze may solidify but will re-melt when reheated.
Freezer Storage: Freeze cooked chicken in freezer-safe containers for up to 3 months. Thaw overnight in refrigerator before reheating.
Reheating Methods: For best results, reheat in a 350°F oven for 10-15 minutes to restore crispy skin. Microwave reheating works but may soften the skin.
Make-Ahead Tips: Prepare the glaze up to 3 days in advance and store refrigerated. Season chicken thighs the night before for enhanced flavor penetration.
Portion Control: Freeze individual portions in vacuum-sealed bags for convenient single-serving meals that maintain quality and prevent waste.
Glaze Preservation: Extra glaze keeps refrigerated for up to 1 week and makes an excellent stir-fry sauce or marinade for other proteins.
Conclusion
These honey garlic chicken thighs deliver the perfect combination of crispy skin, juicy meat, and irresistible sticky glaze in just 60 minutes. The recipe balances sweet honey with savory garlic and umami-rich soy sauce, creating a crowd-pleasing dish that’s both simple enough for weeknight dinners and impressive enough for entertaining.
Ready to create your own crispy, glazed masterpiece? Try this recipe tonight and share your results in the comments below! Don’t forget to subscribe to our blog for more easy, delicious recipes that bring restaurant-quality flavors to your home kitchen. Your taste buds will thank you!
FAQs
Q: Can I use boneless chicken thighs instead of bone-in? A: Absolutely! Boneless thighs work wonderfully and cook faster (25-30 minutes total). You’ll miss the crispy skin element, but the meat will still be juicy and flavorful with the sticky glaze.
Q: How do I know when the chicken is properly cooked? A: Use a meat thermometer to check that the internal temperature reaches 165°F at the thickest part of the thigh. The juices should run clear, and the meat should pull away from the bone easily.
Q: Can I make this recipe ahead of time? A: Yes! You can prepare the glaze up to 3 days in advance and season the chicken the night before. For best results, cook fresh rather than reheating, as the skin won’t be as crispy.
Q: What if my glaze becomes too thick? A: Simply add 1-2 tablespoons of warm water or chicken broth to thin it out. If it’s too thin, simmer for a few extra minutes to reduce and thicken naturally.
Q: Is this recipe gluten-free? A: The recipe contains soy sauce, which typically includes wheat. For gluten-free version, substitute tamari or coconut aminos for the soy sauce without changing any other ingredients.
Q: Can I double this recipe for a larger crowd? A: Yes, but cook in batches to avoid overcrowding. Use two large skillets or cook in stages, keeping the first batch warm in a low oven while preparing the second batch.